How to Use DeepSeek API Key in NextChat
If you are searching for how to use a DeepSeek API key in NextChat, what you usually want is not just a model name or a random Base URL. You want a working path from account creation to the first successful message inside NextChat. This guide is written exactly for that.
AI Token Proxy is a third-party DeepSeek-compatible access system. When setting up NextChat, make sure you add a custom provider instead of pasting the key into a default official provider slot.
What you need before you start
- An AI Token Proxy account
- A verified email address
- Recharge balance for API usage
- An API key created inside AI Token Proxy
- NextChat installed and ready to configure
Step 1. Register an account
Open AI Token Proxy, click Register in the top-right corner, then fill in Username, Email, Password, and Confirm Password. Submit the form to create your account.
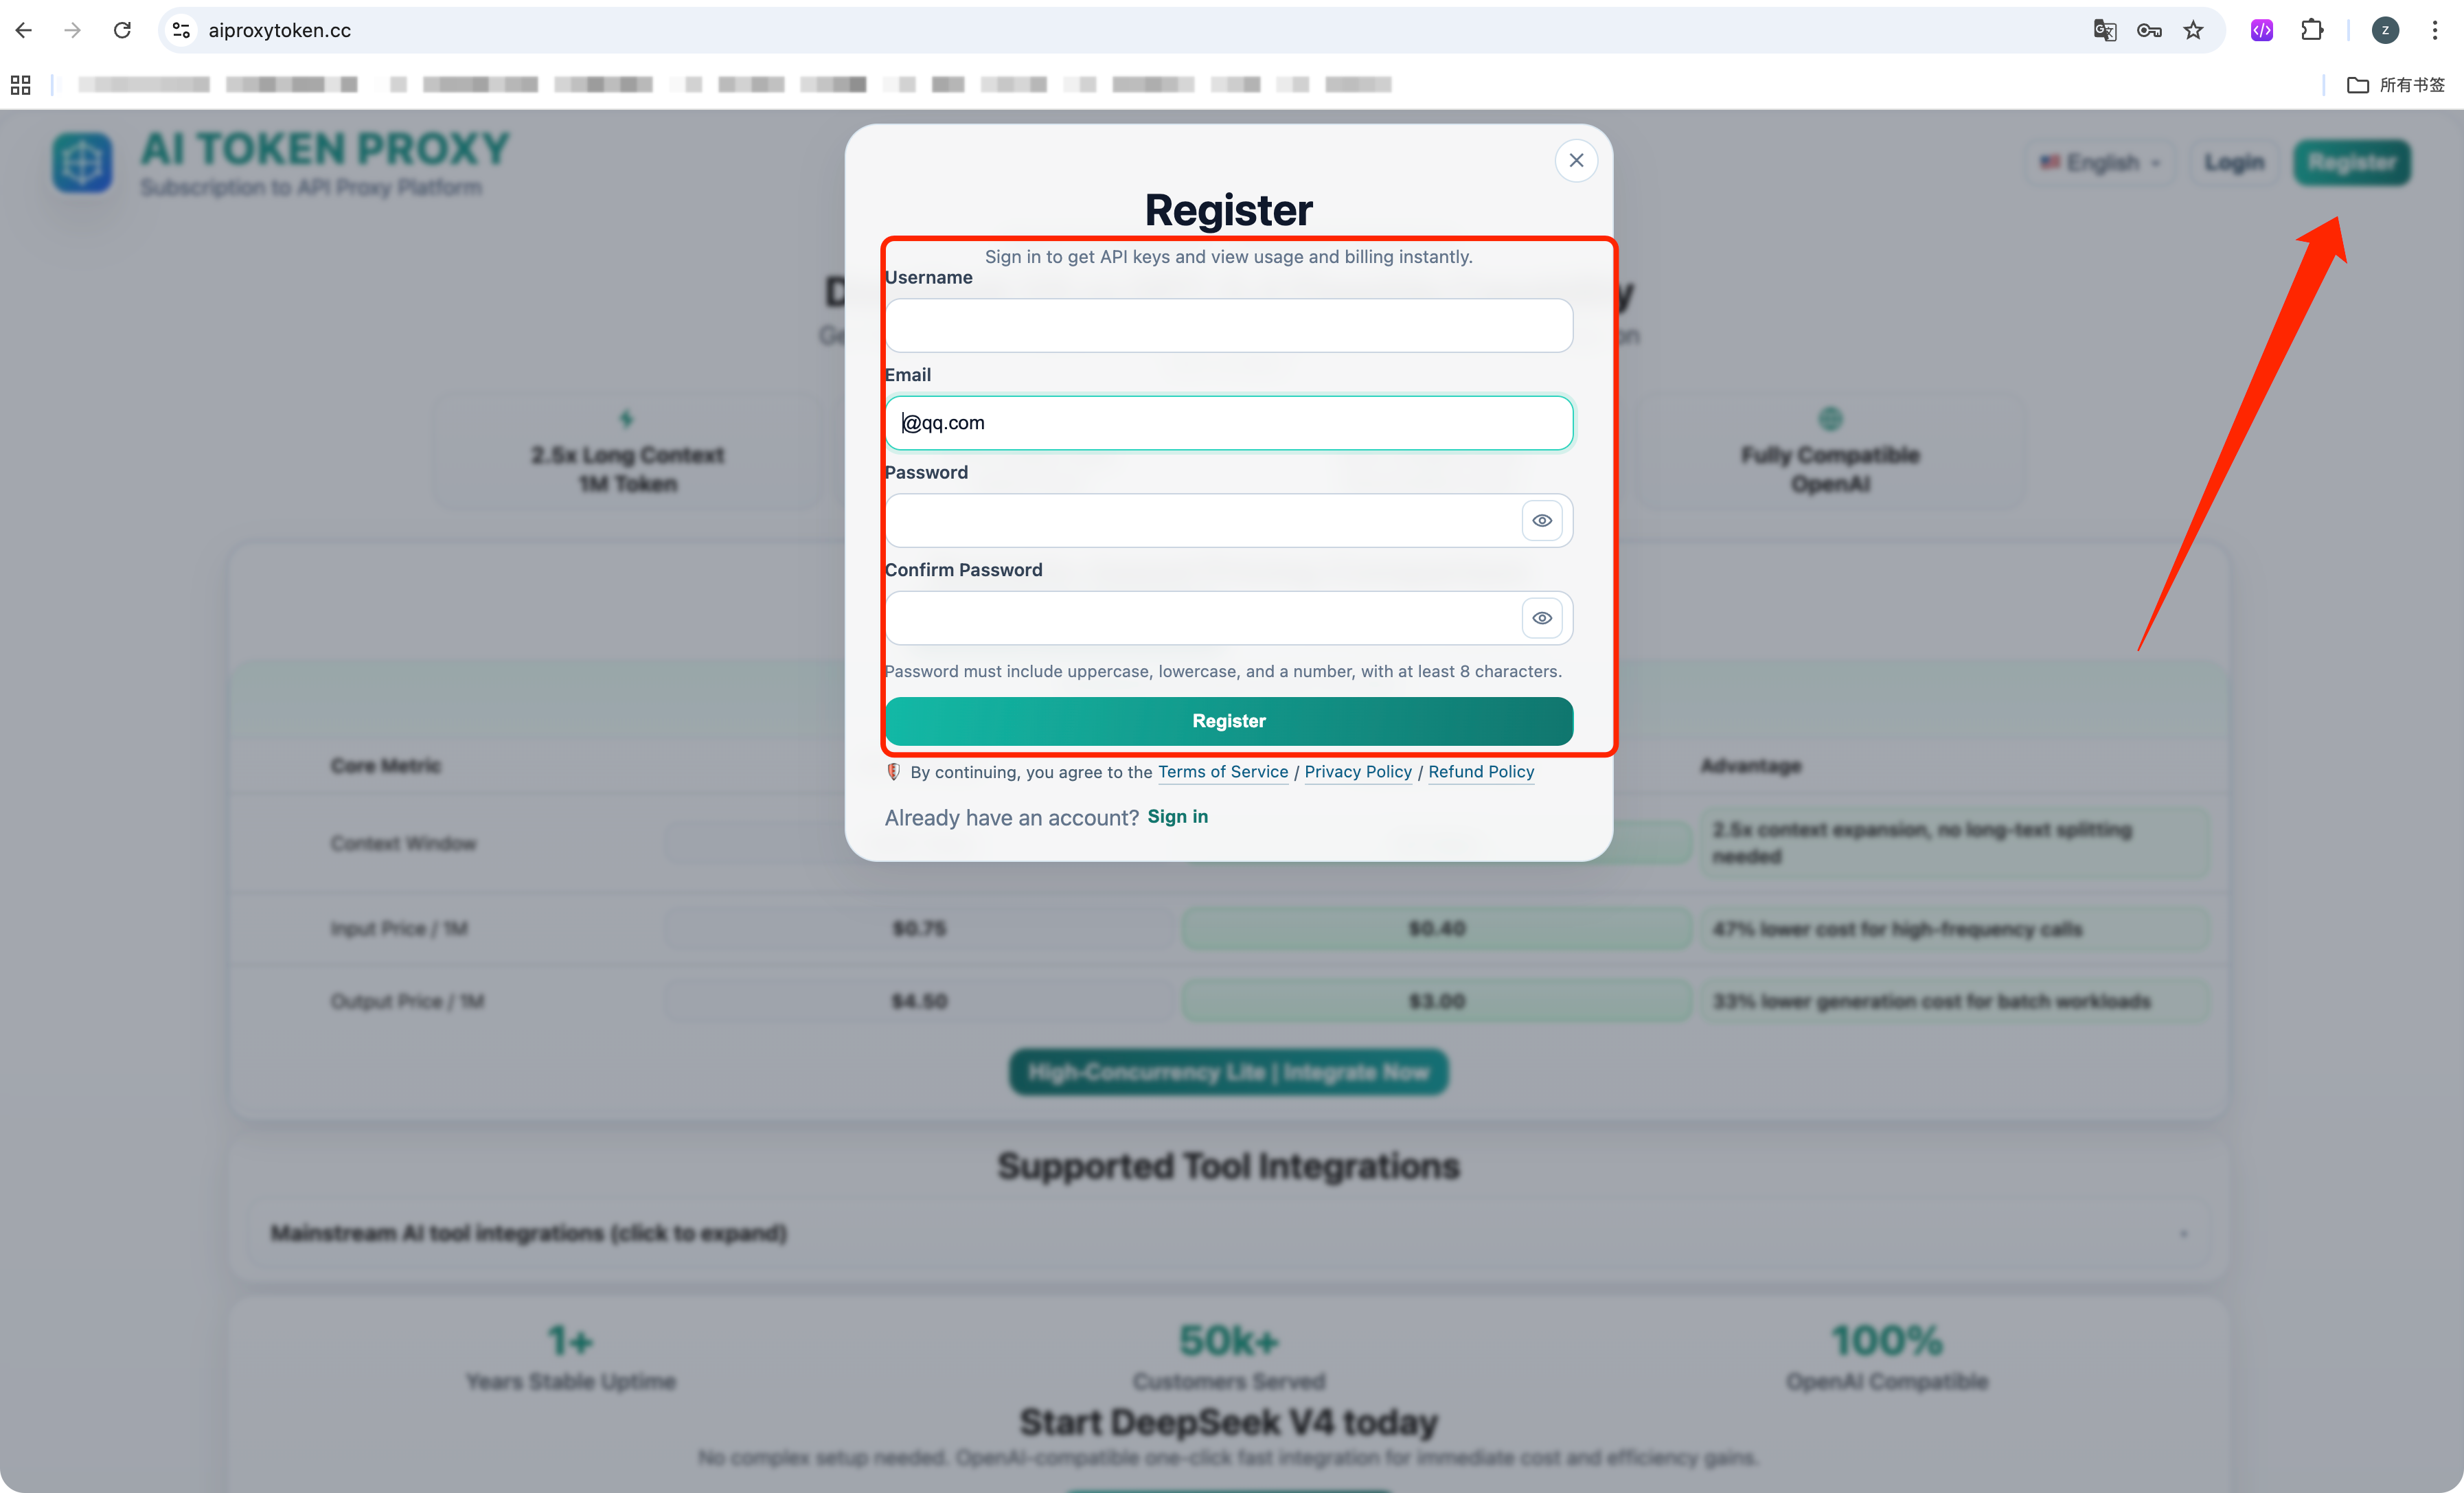 Register your AI Token Proxy account
Use this page to create the account that will later be used for recharge, API key creation, and NextChat access.
Register your AI Token Proxy account
Use this page to create the account that will later be used for recharge, API key creation, and NextChat access.
Step 2. Verify your email before login
After registration, the email address you used will receive a verification email. Open that email and click the verification link to activate the account. If you skip this step, the platform will block login until the email is verified.
Step 3. Sign in to the platform
Once the email is verified, return to the login dialog, enter your Email / Username and Password, then click Sign in.
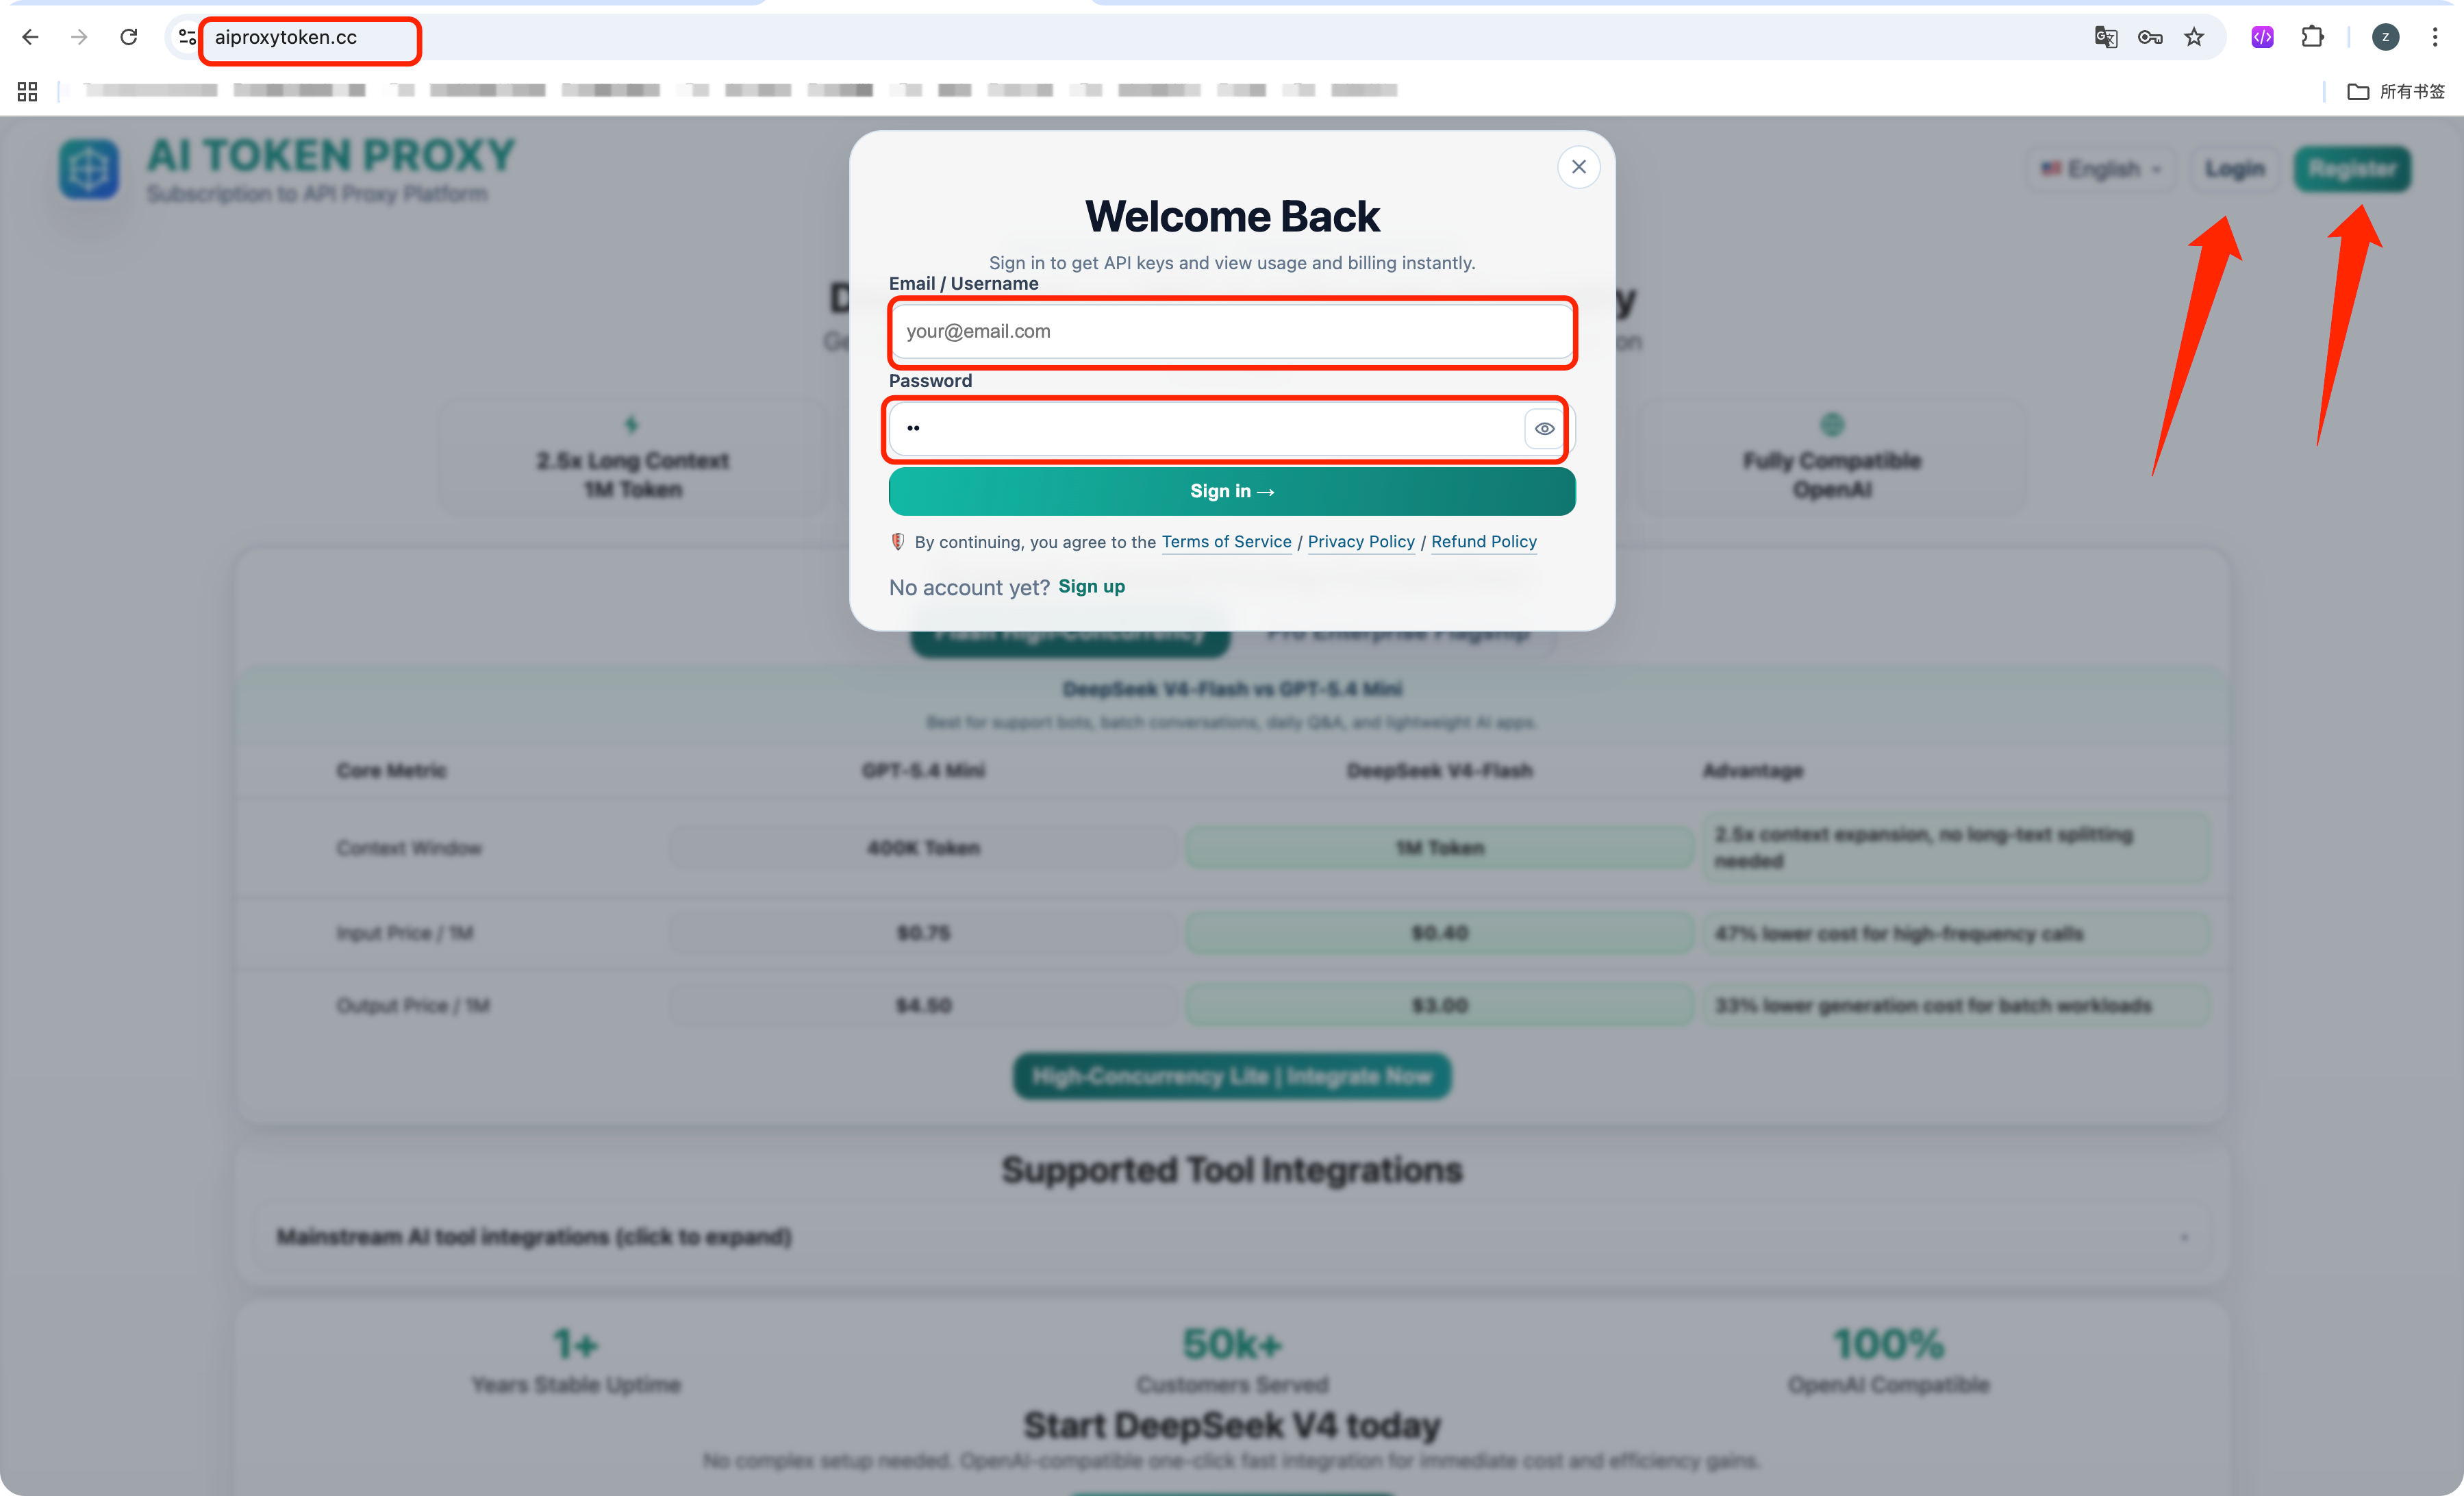 Log in after email verification
Only verified accounts can continue to the recharge page, API key module, and proxy tools.
Log in after email verification
Only verified accounts can continue to the recharge page, API key module, and proxy tools.
Step 4. Recharge your account balance
Go to the left-side Recharge page, choose a recharge amount, confirm the default payment method is Paddle, and click Pay Now. Your balance is used for API calls, so this step is required before actual usage.
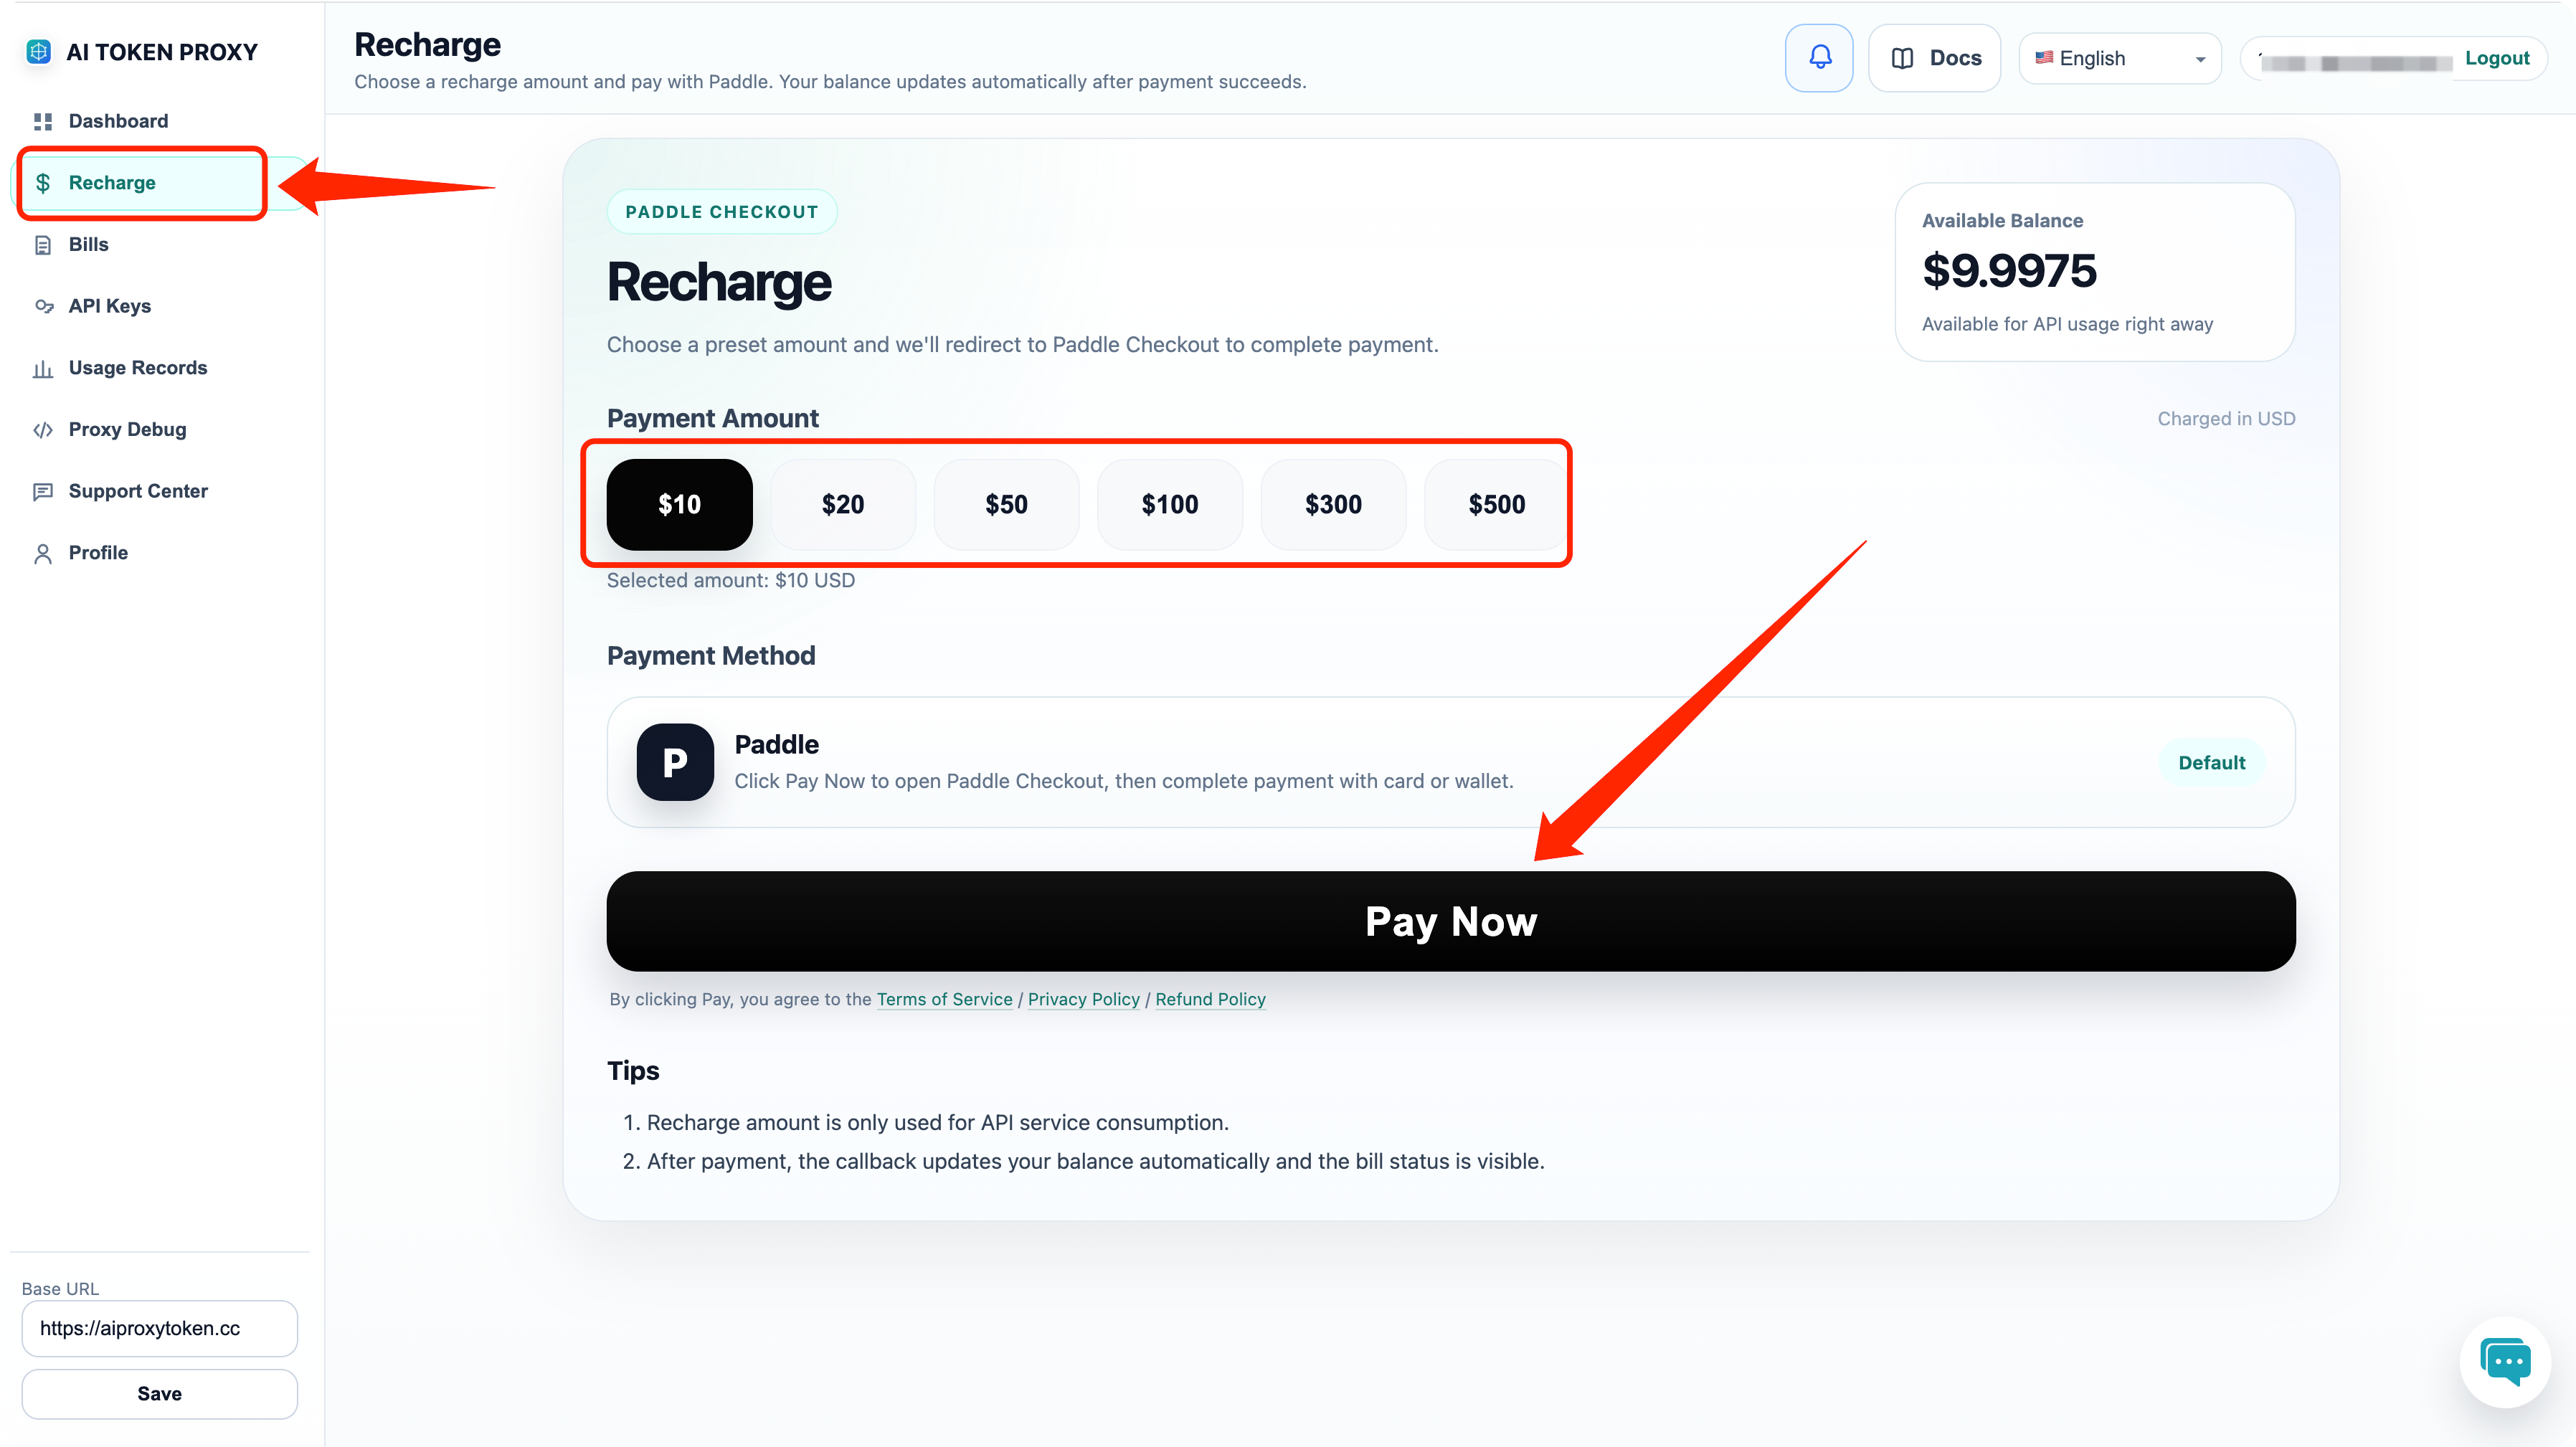 Recharge before using the API
Select a preset amount and complete the payment so the account has available balance for requests.
Recharge before using the API
Select a preset amount and complete the payment so the account has available balance for requests.
Step 5. Create and prepare your API key
Open the API Keys page. Click Create Key to create a new key if needed. After a key is available, copy it when necessary and remember that the Use action is the entry to the integration flow.
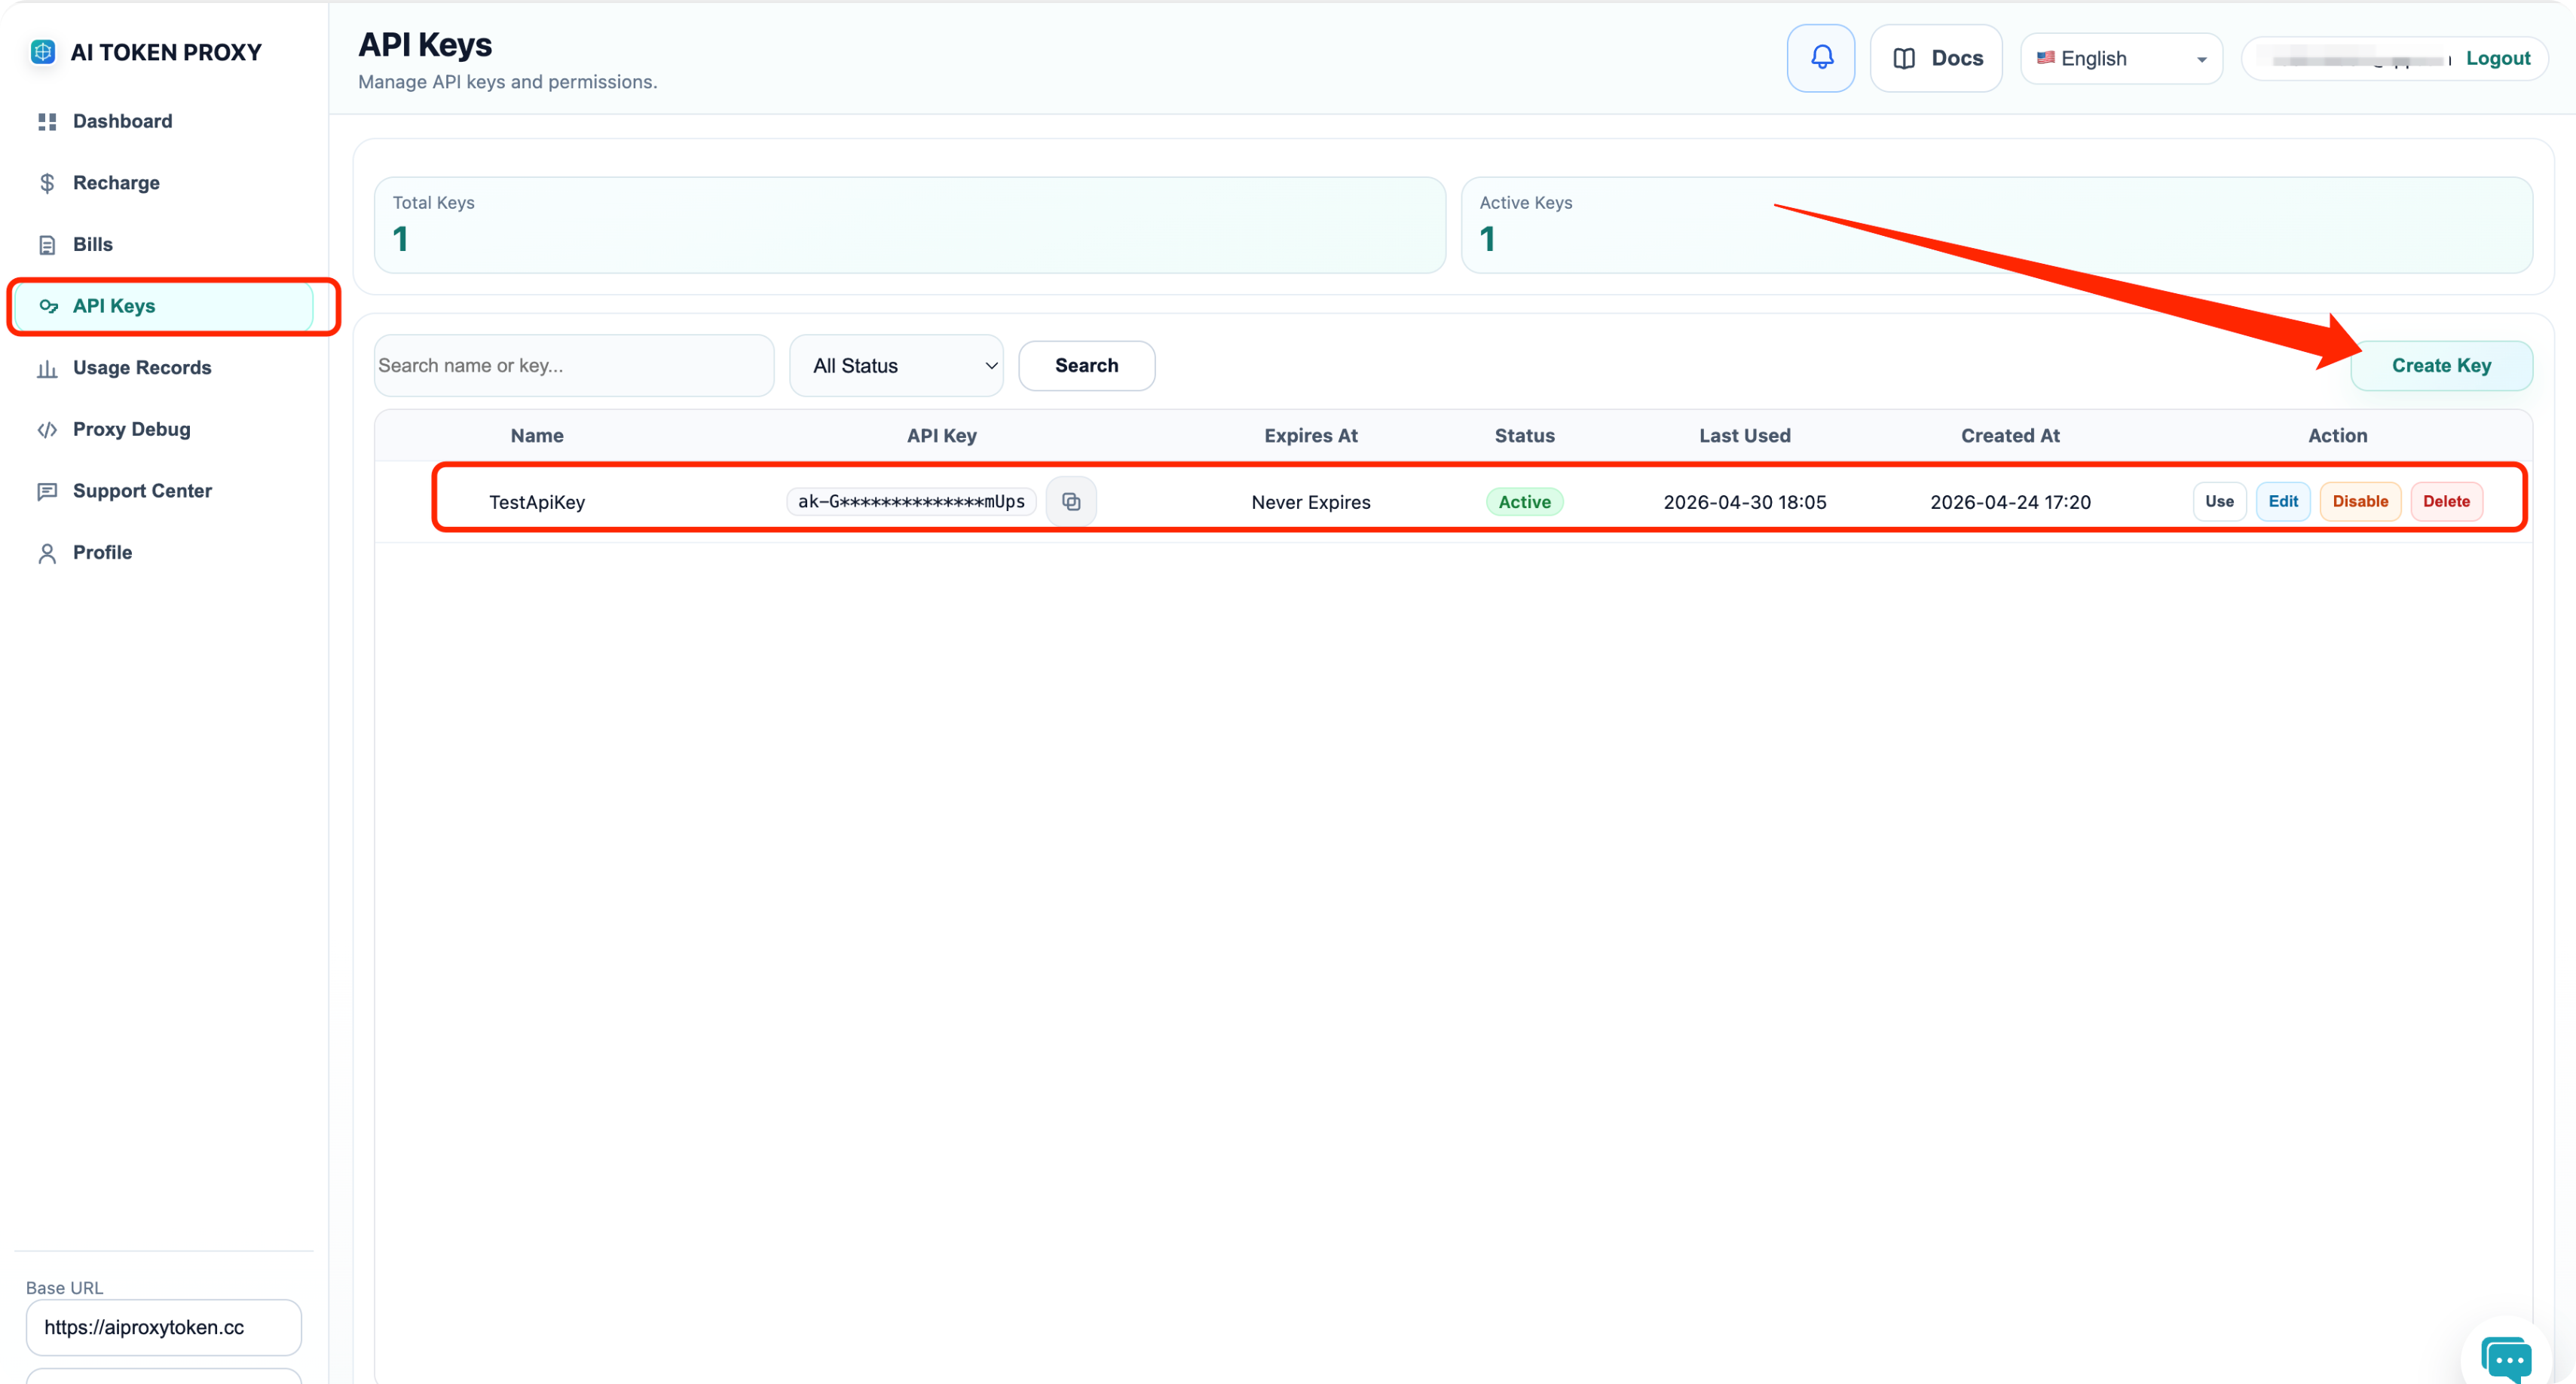 Create a new API key or reuse an existing one
The key shown here will be used later when NextChat imports the provider configuration.
Create a new API key or reuse an existing one
The key shown here will be used later when NextChat imports the provider configuration.
Step 6. Copy the cURL example from Proxy Debug
Open Proxy Debug in AI Token Proxy. On the right side under Request Examples, keep the language on cURL, then click Copy Code. This copied cURL snippet is the exact content that will be pasted into NextChat.
 Copy the full cURL request example
NextChat can parse this snippet automatically, including the endpoint, API key, and model information.
Copy the full cURL request example
NextChat can parse this snippet automatically, including the endpoint, API key, and model information.
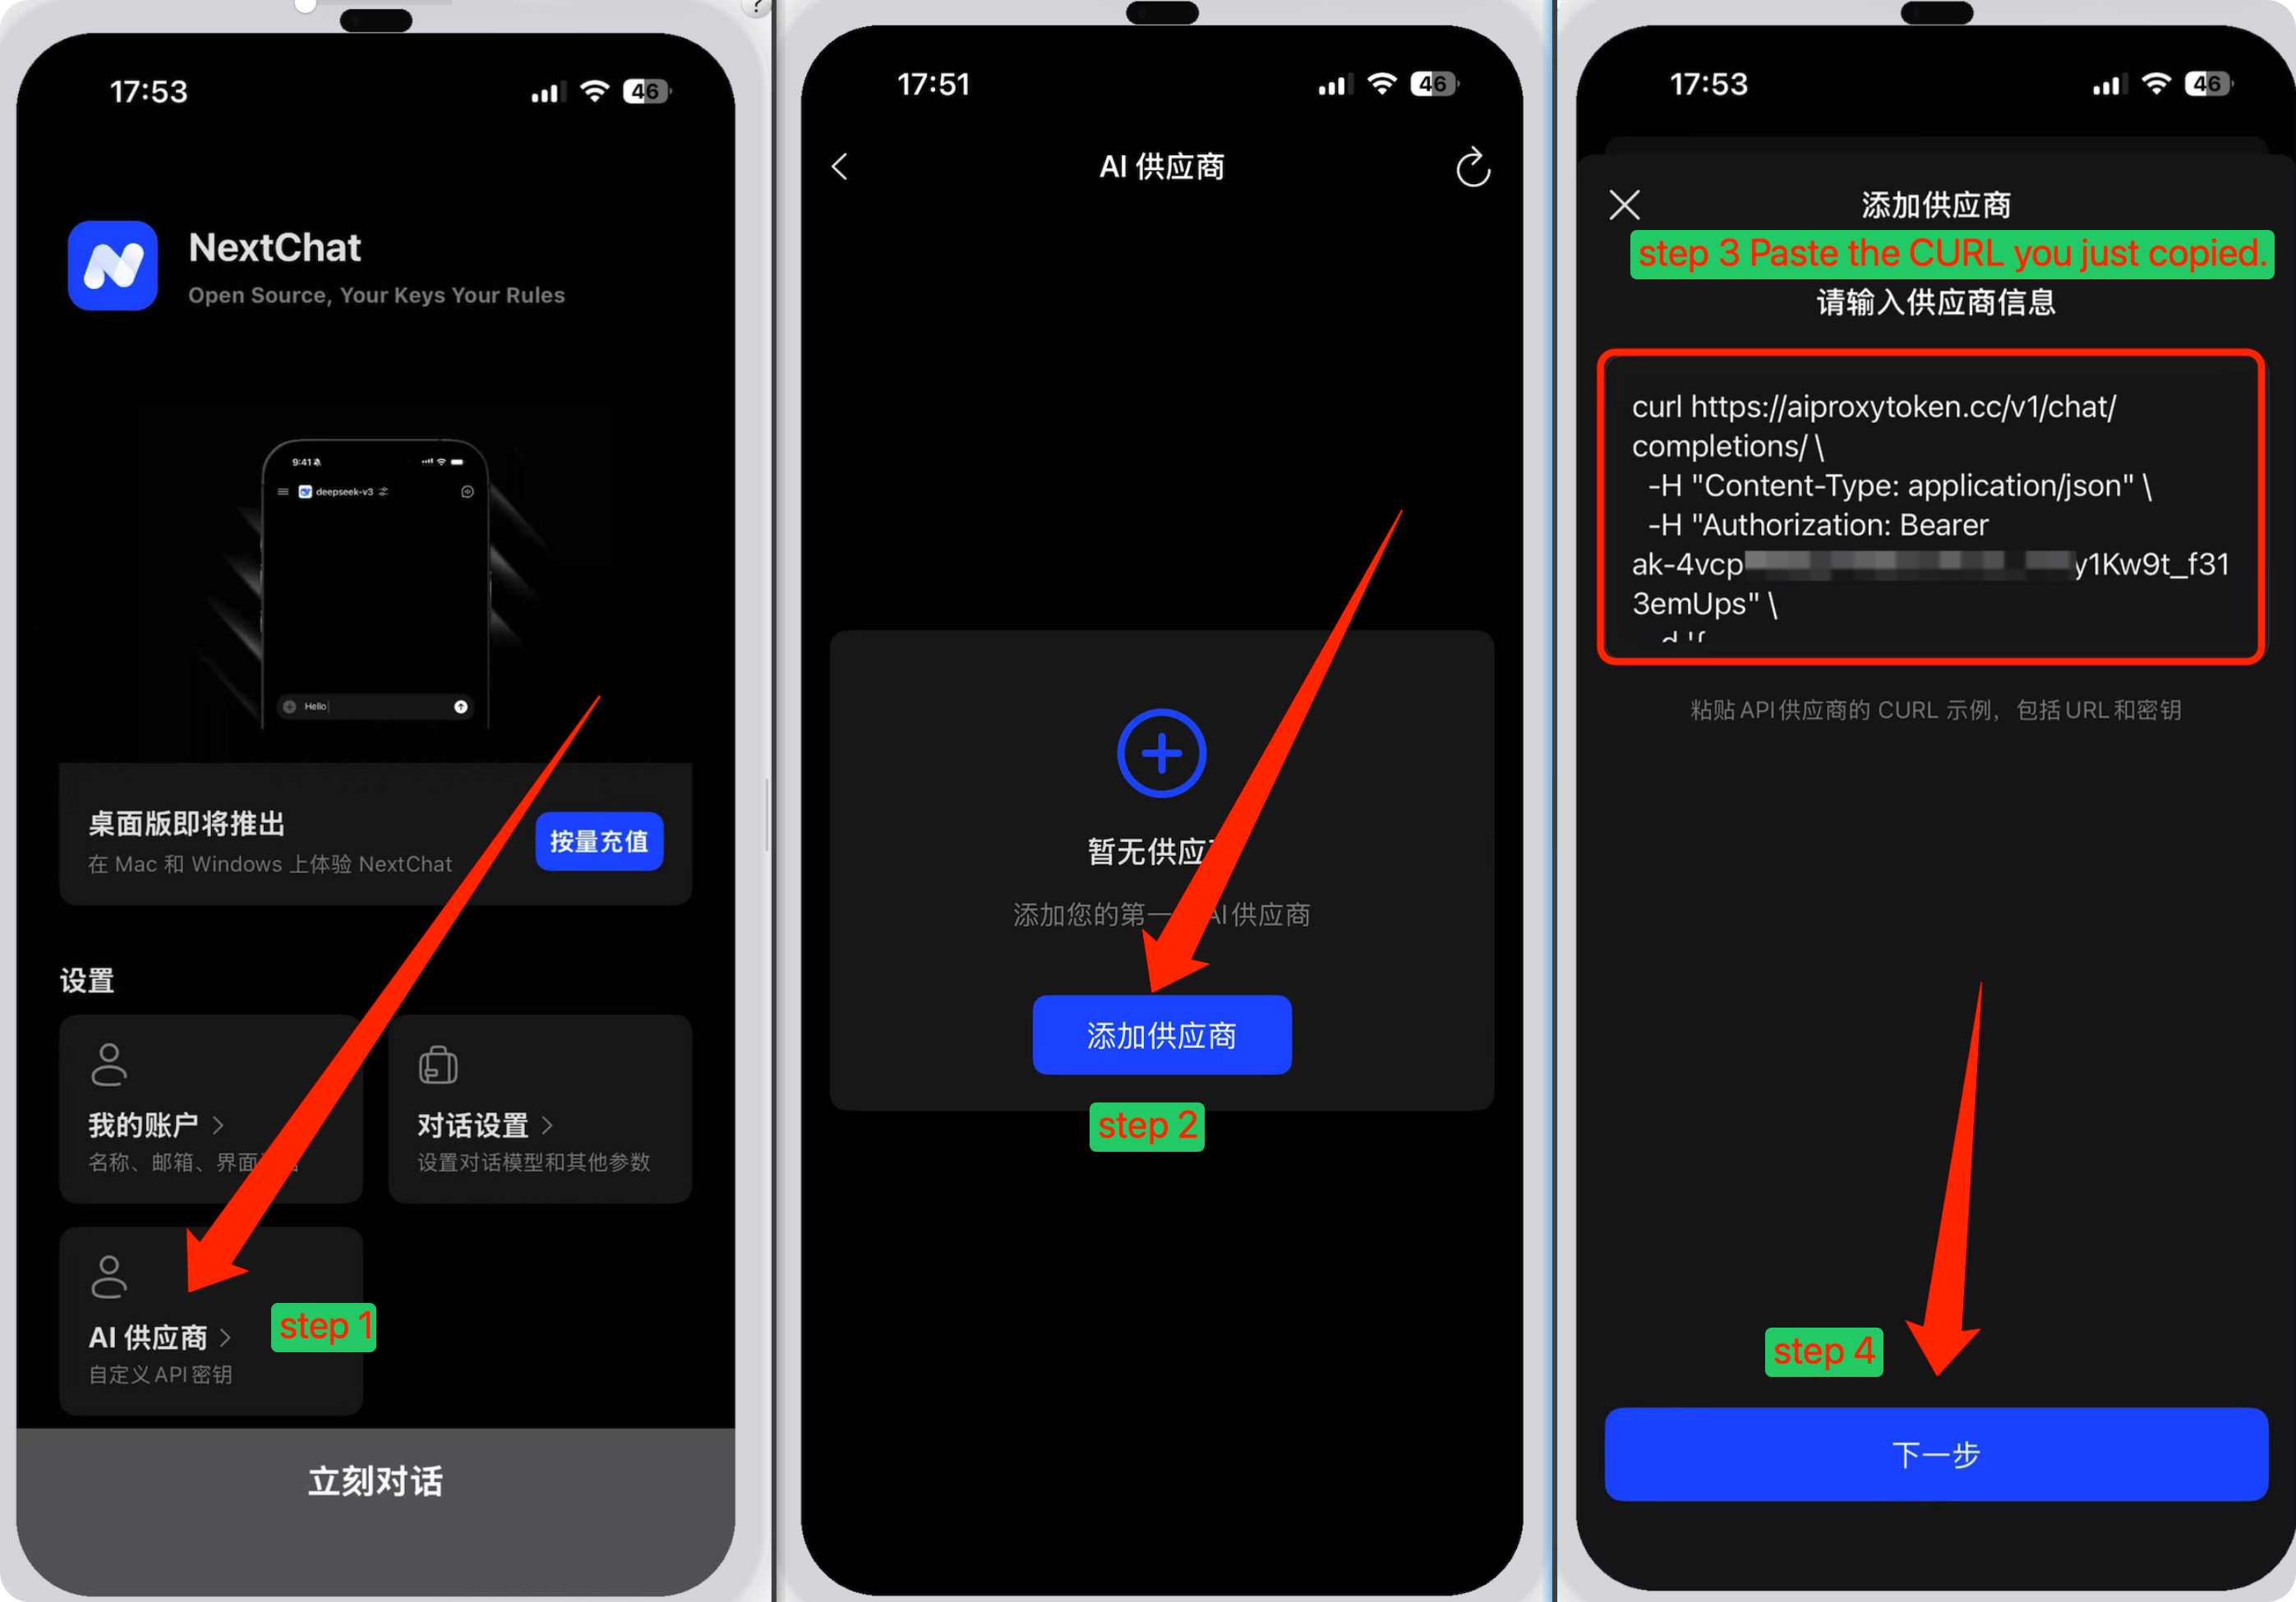
Step 7. Add AI Token Proxy as a provider in NextChat
Open NextChat, enter AI Providers, tap Add Provider, then paste the cURL snippet copied from Proxy Debug and continue to the next step.
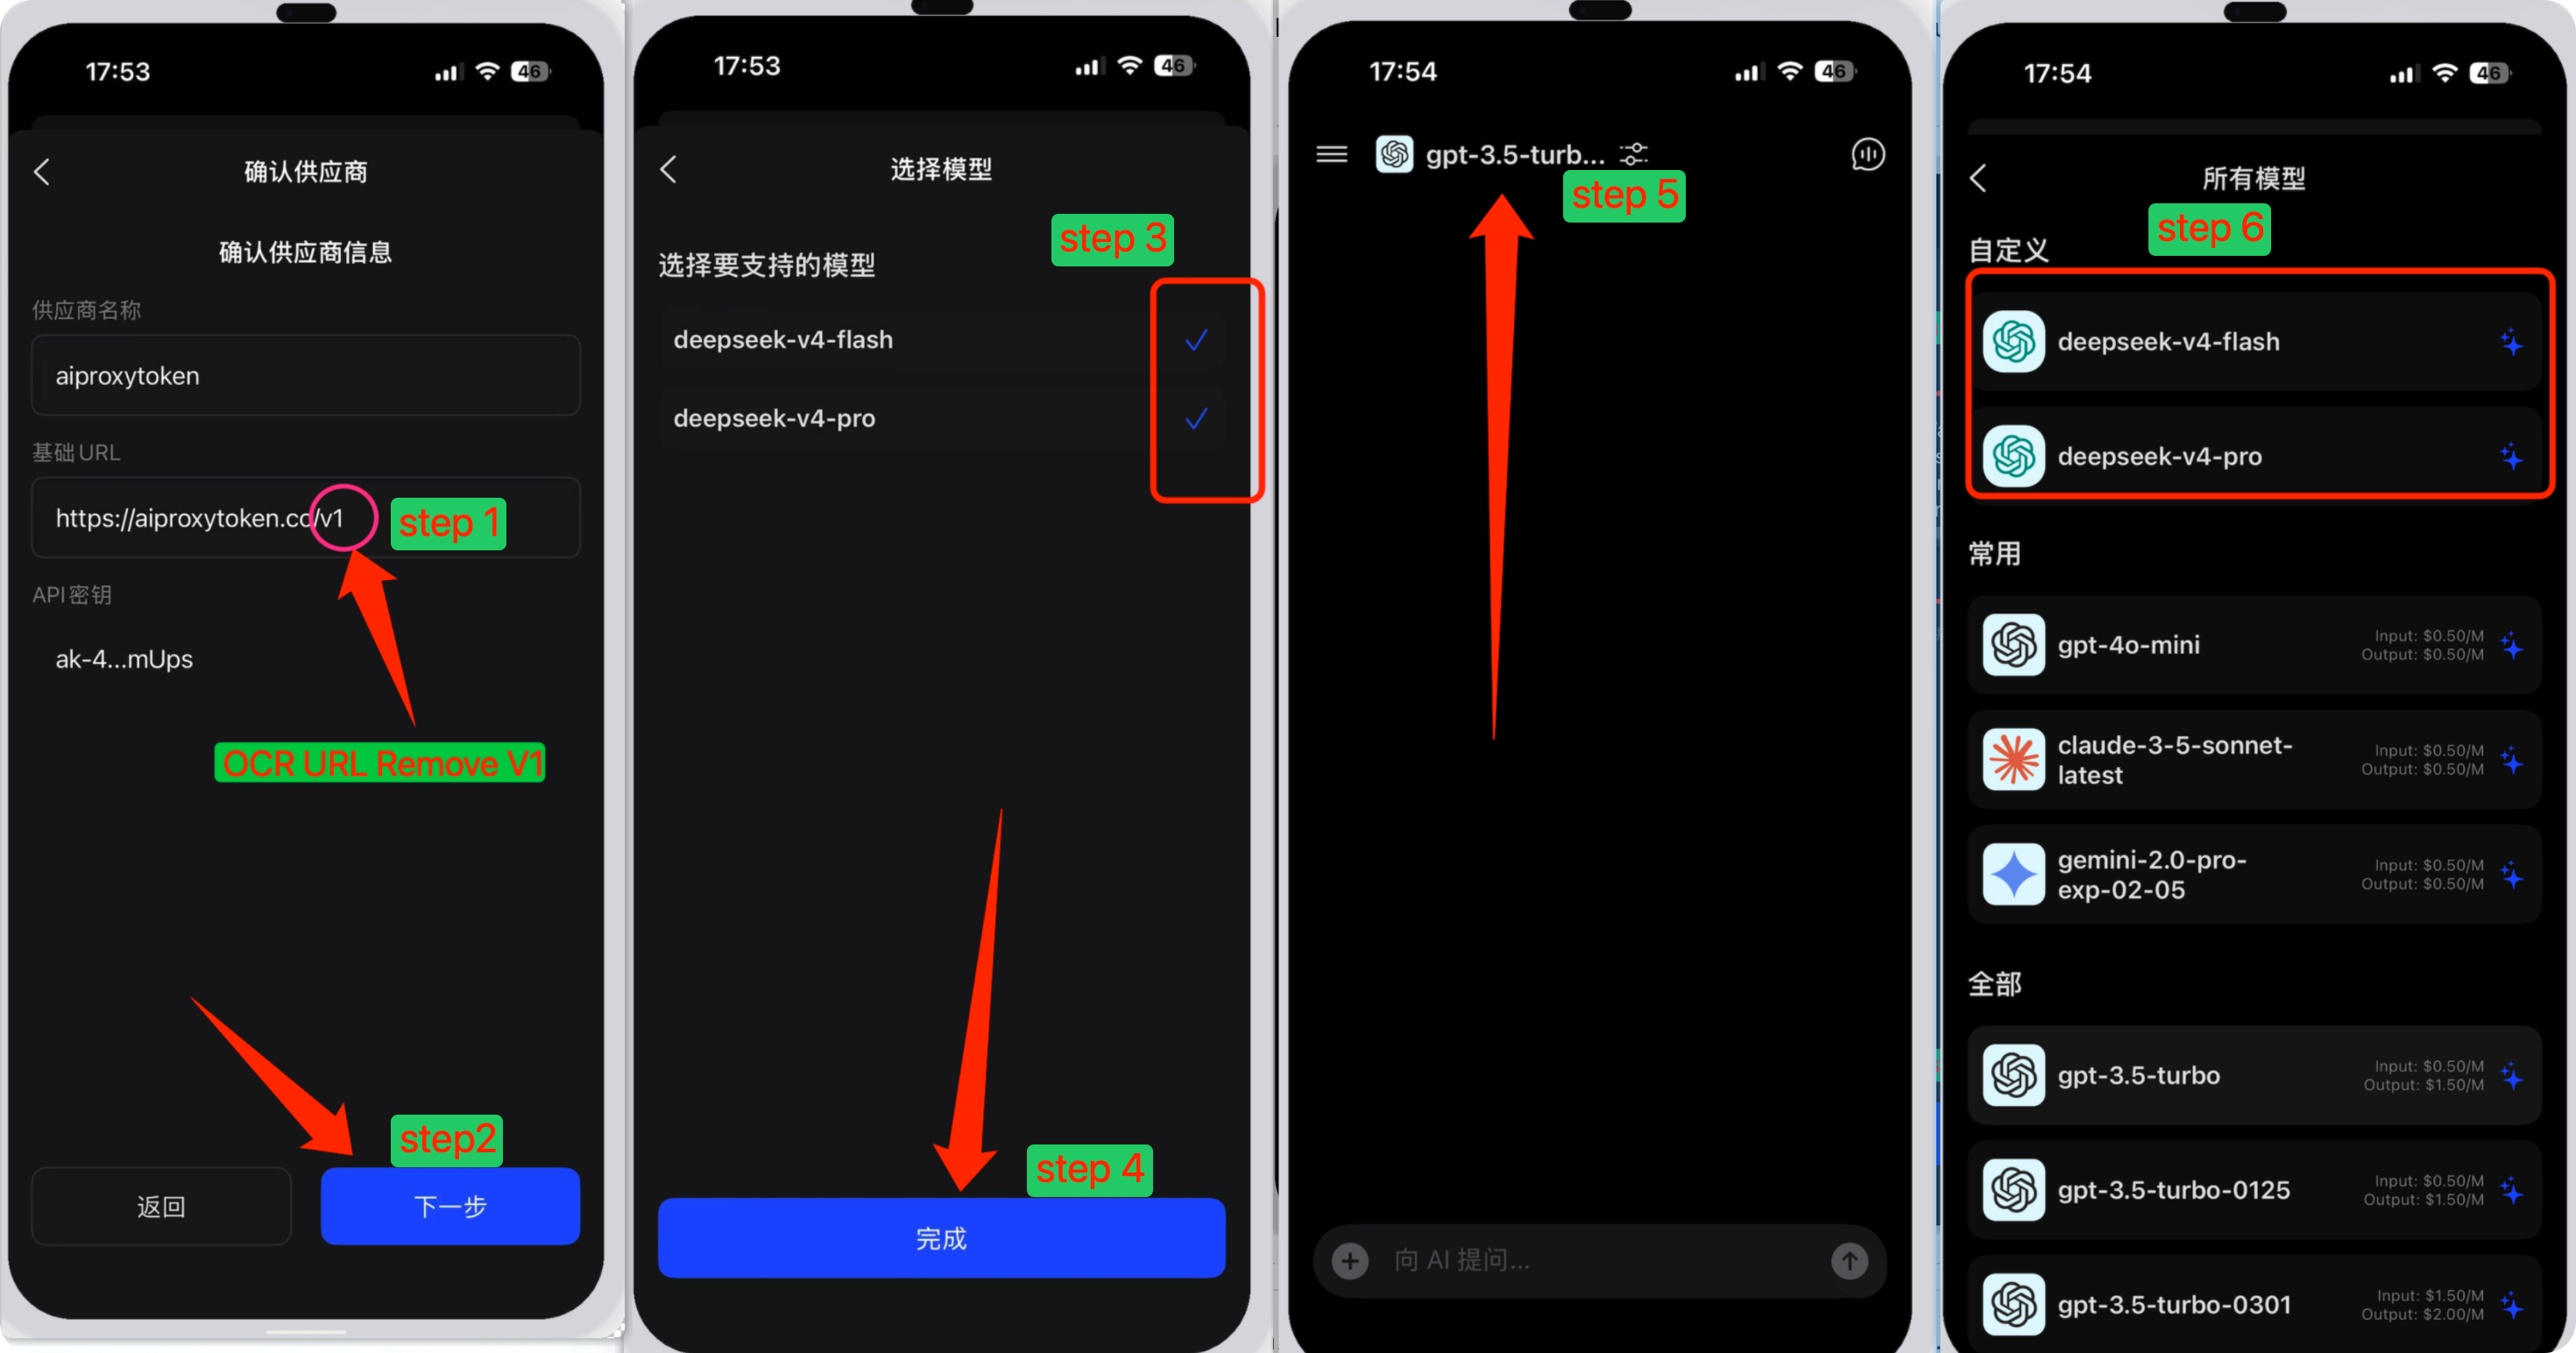
Step 8. Fix the Base URL and select models
After NextChat parses the cURL snippet, it may auto-fill the Base URL as https://aiproxytoken.cc/v1.
You need to manually remove the trailing /v1, so the correct Base URL becomes https://aiproxytoken.cc.
Then continue to the model selection screen.
Important: If NextChat auto-fills https://aiproxytoken.cc/v1,
delete the trailing /v1 manually. Keep only https://aiproxytoken.cc as
the Base URL.
NextChat will then read the models exposed by the proxy automatically. Make sure both deepseek-v4-flash and deepseek-v4-pro are checked before saving the provider.
After the provider is created, return to the main chat screen, tap the current model name at the top, and switch to either deepseek-v4-flash or deepseek-v4-pro from the custom model list.
Quick reminder: if the models are visible but cannot be selected, first confirm
the Base URL does not contain /v1, then reopen the provider and re-sync the model
list.
Common mistakes
- Trying to log in before opening the email verification link.
- Using the account without recharge balance.
- Forgetting to copy the cURL example from Proxy Debug and trying to rebuild the provider manually.
- Leaving the Base URL as
https://aiproxytoken.cc/v1instead of removing the trailing/v1. - Failing to select both
deepseek-v4-flashanddeepseek-v4-produring model sync.
The simple takeaway
Using DeepSeek in NextChat is not only about getting a key. The reliable path is: register, verify your
email, log in, recharge, prepare an API key, copy the cURL example from Proxy Debug, import it into
NextChat, remove the extra /v1, and then choose the DeepSeek model you want to use. Once
this chain is clear, the setup becomes much easier and repeatable.
AI Token Proxy helps users manage API keys, recharge balance, usage records, and integration setup in one place, so connecting DeepSeek-compatible access to tools like NextChat becomes much more practical.